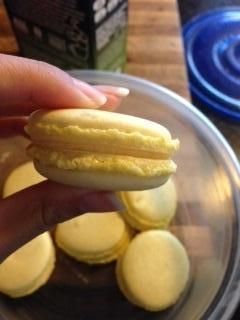
Hellooo and happy new year! If you guys knew me back in 2016, you'd know that I said that I was a convert of the French method. But as a baker, you always want to improve. However, I've tried a version of the Italian method that I have grown to love and my customers do love it as well. I would love to share with you my updated Italian method recipe, as well as the French which is used in my recently published book (in the next post).
For starters, I will just use the Vanilla Bean Macarons recipe. I have adapted it from Bouchon Bakery's cookbook. If you've ever tried Bouchon Bakery, their macarons are not too sweet, slightly chewy but melts in your mouth. Paired with my delicious, fluffy, and not too sweet new buttercream recipe, it becomes a crowd favorite.
What I do like about this recipe is that it isn't too sweet (personally) and that the shells come out smooth and with smaller feet. They also tend to dry a little faster than the French method. I also have some new tips to add to help speed up your macaron making process, which I will include in another post later. I did not include a recipe for only 1 dozen, because the macarons seems to not turn out as well when I split it up in small batches. The original recipe makes 4 dozen macarons, but I'm sure most don't want to make that many. So I included this recipe for 2 dozen.
Hi everyone, happy Friday! erm..Saturday. Tomorrow is a friend's birthday, and he told me he liked a banana chocolate macaron he tried from when I took a macaron class. Unfortunately, I did not make that macaron because each person in the class was assigned. So I decided to recreate it :)
In the original macaron, the shells were not flavored. But I wanted to throw in an extra twist and put real bananas in the shells! Using freeze dried bananas from Trader Joe's :) I really love Trader Joe's! They have so many items that you can't find anywhere else (except Whole Foods or something, but Trader Joe's is much cheaper) and they're reasonable prices. Mostly where I get my almonds to make the macarons as well.
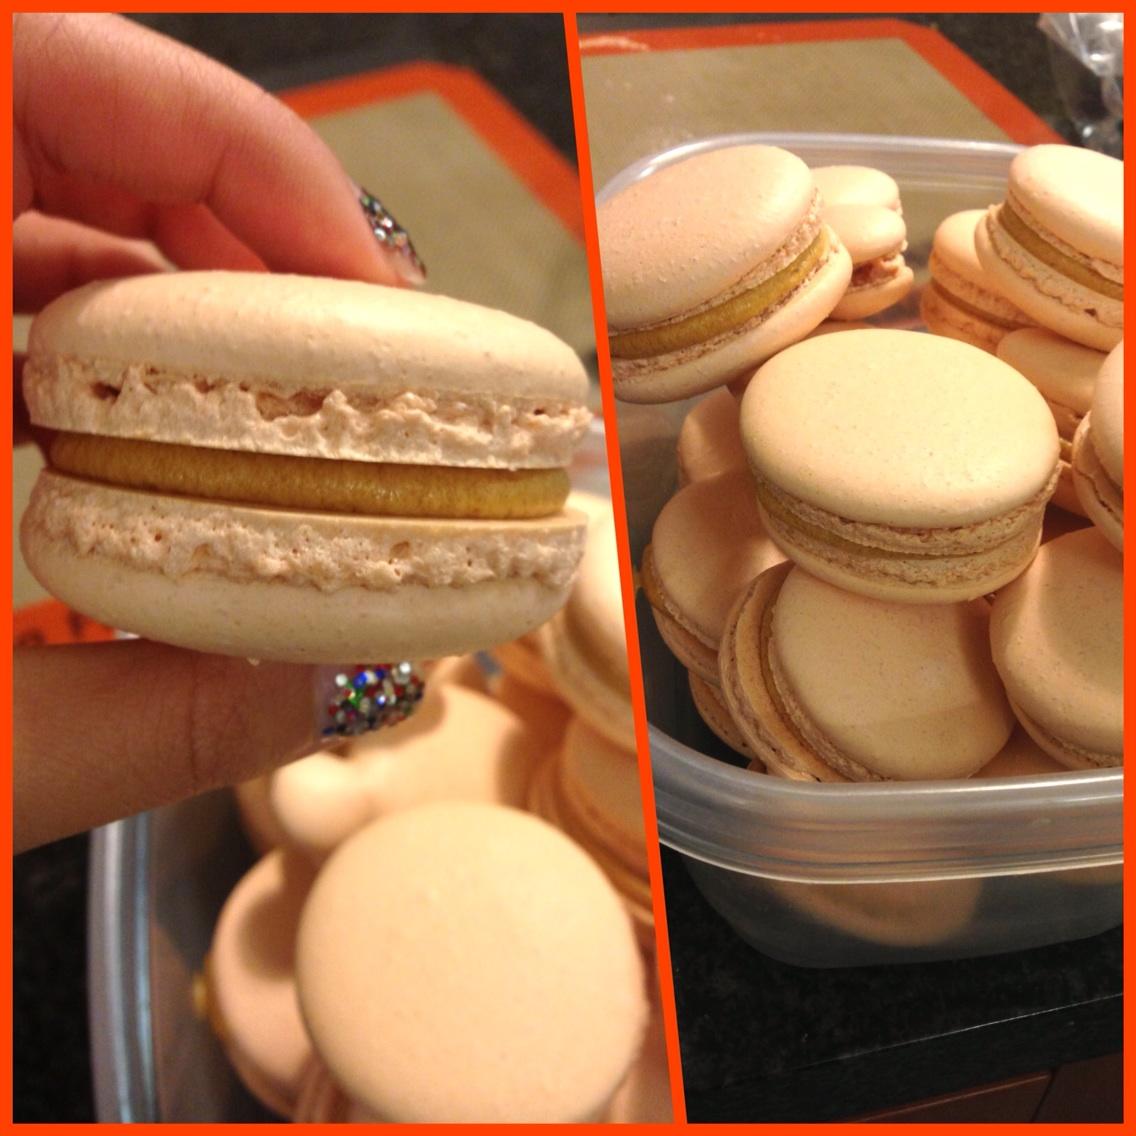
Anyways, I replaced 10g of almonds in the usual recipe with 10g of freeze dried bananas that I ground up in a food processor and sifted. This gave the shells a yummy, chewy consistency and a strong banana flavor.
See the insides are nice and soft, as well as fluffy. The outer shells on these are really thin, so it doesn't really crunch when you bite it. But that way it gives you the consistency of real fruit. I used a regular semisweet chocolate ganache as the filling. I tried to add banana flavor into the ganache, but for some reason the semisweet chocolate probably outshines the banana flavor. So instead when you bite into it, it reminds me of those chocolate dipped bananas. Yum...give it a try :)
Also, while I was making these today, I accidentally didn't let the sugar syrup boil to 240, so I was left with a wet, droopy meringue. Don't let that happen...or else you'll get cracked mushy things with atrocious feet. I had to toss those and make a new batch. Luckily I only made half a batch. Lesson learned: do not try to take shortcuts :/
Hi everyone! Today I made tiramisu macarons, and they are so delicious. The cream filling is to die for! (literally..just kidding) It's a mascarpone whipped cream filling, and the shell is basic vanilla bean sprinkled with cocoa powder for that nice tiramisu look. I brushed the bottoms of the shells with brewed coffee, hopefully some coffee flavor will come through. If not, time to try again. I sprinkled some crumbled ladyfingers in the filling as well, but I don't know if that will convey tiramisu either. Maybe next time I can put the coffee in the shell so it comes through better. Anyways, the cream tastes great, and all you need are three simple ingredients: mascarpone cheese, whipping cream, and a bit of powdered sugar. It's not too sweet, and it is simple and yummy to prepare! Just whip the cream in a bowl under a bowl of ice water until you get stiff peaks and then add a bit of mascarpone, whip, and add a bit of powdered sugar for sweetness. The sweetness is already in the macaron, but it seems like this one isn't really too sweet at all since the bitter cocoa powder evens it out. I would say this is my favorite macaron now :O
See how these are nice and fluffy? I was having a bit of trouble trying to get the best texture since most of the time my oven would make the interiors gummy and sink to the bottom, causing hollow shells. I baked these at 315 degrees because my oven is a bit weird, and then let them bake an extra two minutes so the insides set completely. This results in a crunchier shell, but with maturation, the crunchiness disappears. So as long as you deflate the batter correctly as I have shown in my past post and turn up the heat a bit and overcook them slightly, you won't have hollows in your macarons. (thank god) Hollows drive me insane!
Hi all! I am pretty sure all of you have had trouble with macarons...especially with the outsides looking all pretty, but the insides looking terrible and ghastly, like there is nothing inside (aka hollow). I've had that problem quite a few times, and it makes me mad! However, I recently took a professional macaron class, and now I have to say that I have no more hollows. :) See?
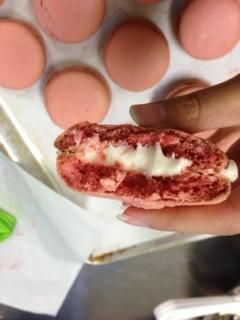
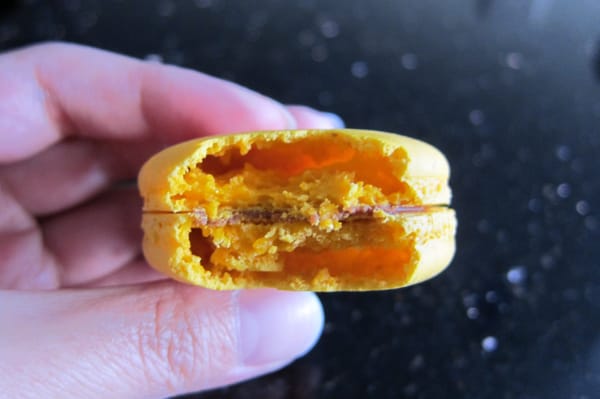
Red Velvet Macarons with a cream cheese filling & Mango Macarons with a Mango Swiss Meringue Buttercream
These were for 3 recent orders I had for Valentine's Day. I let my boyfriend try the mango one, and he LOVED it. He said the texture was perfect, and it melted in your mouth with a good amount of mango flavor.
Previously, most of my macarons in the past when I began making them were quite hollow, or had large air pockets. In many tutorials on youtube, they do not show you how to incorporate the tant pour tant with the meringue correctly. My macaron teacher showed us how to correctly fold it so that there is no excess air in the batter. You fold the batter, scratch the bottom of the bowl a few times, and then turn the bowl to get better leverage over the whole batter. You repeat this a couple of times until you get batter that still has shape, yet flows very well like a liquid. If you tilt the bowl, it should flow down to that side with ease, but not with too much ease that it looks like water. If you pipe them out, they should slowly go down to a flat circle, not a big lump. Here is a comparison:
This one is undermixed..a bit lumpy and doesn't flatten.
This one is perfect! Nice, flat, circles that do not spread too much.
After proceeding with this important step, make sure that you pop all the air bubbles you see after dropping the pans with a toothpick.
One crucial item I bought recently was an oven thermometer! Seriously, you can't trust what your oven tells you...like that one friend you think is telling the truth, but is really screwing you over....
Anyways, I always preheated my oven to 300 degrees...as so it says on my oven. However, the macarons would always seem to deflate a lot when I took them out. Then I got the idea of "Hmm, maybe I should turn up the temperature and see if that helps". So I turned it up to 310, and voila! There were no hollows! What a difference 10 degrees makes. When I put my new oven thermometer in the oven and preheated it to 300 degrees, I noticed that the thermometer read somewhere between 270-280 degrees!!! That's not right at all. WAYY too low for the macarons' structure to set, and probably that's what caused all the fluffy yummy goodness of the interiors to fall to the bottom of the shells, making the shells as light as air. So this time I turned up the temperature to 305, and it came out with better shells, yet still some air pockets. I turned it up to 310, and the shells were perfect. Not browned on the tops at all! The temperature on the oven thermometer actually read 300 degrees this time. Oven temperature is a BIG BIG factor in determining how your macarons come out.
Another trick that I learned in macaron class was to use an offset spatula to scrape all the macarons off the Silpat at one time. It saves you a lot of time, and destroyed shells. I used to have to pick them off with my hands, but that would sometimes end up with their little bottoms still on the Silpat. You just basically scrape through them and they come off cleanly!:)
I also learned that you should rest the batter until they are firm to the touch. Not SLIGHTLY firm, but FIRM. If it's slightly firm, it still may crack in the oven. The best way to achieive this is a fan!:) And if you are baking on not-so-good quality baking sheets (like thin ones you buy at Ross) you should double-stack them. But if you are using good quality aluminum pans like Nordic Ware, no need to double stack!
Well, hope I helped you with some tips. I should post my own pictures sometime...haha
These are probably my favorite macarons thus far. So yummy and cute! Above is a series of pictures that explain how I make macarons. :)
Top from left:
Boiling the sugar syrup to 250 degrees Fahrenheit
Finished Italian Meringue; stiff, shiny, glossy, marshmallowy
Tant pour tant with food coloring (almond flour/powdered sugar/egg whites)
Mixing the meringue with the tant pour tant
Finished macaronage
Freshly piped circles
Macarons that are ready to go in the oven (duller surface and not sticky)
Macarons baking
Finished macaron
Although I love the flavor of these macarons, I think the feet are a tad bit small for some odd reason :( I looked it up online and there's no explanation. I suppose I either overmixed it or I banged it on the table too hard and knocked the air out of them. Oops. At least they're not completely hollow :)
Mostly I am posting it so I won't forget (not like I will anyway), just for my basic recipe. I originally got this recipe from Not So Humble Pie, but I found that the temperature was too high and made ugly frills instead of nice compact feet. So I only edited that aspect, but everything else is spot on. Not too sweet, and the insides are nice and soft. I will be posting pictures of how to make them later on, but I am too lazy at the moment and will just type it out for now.
This is the macaron baked at 325 degrees, as in Not So Humble Pie's recipe. See the frills? Kinda ugly to me. I didn't even post these on Instagram because I hated them so much.
And these are my macarons with the adapted recipe of 300 degrees instead of 325. Nice straight feet and a slightly firm shell.
Which do you guys like better? In any case, these below will be the recipe I am giving. Please use a kitchen or postal scale for these, I find that this creates foolproof macarons that are exact ingredients every single time.
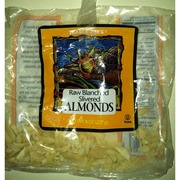
Italian Meringue Macarons (adapted from Not So Humble Pie) Ingredients: Mass: 150g almond meal (It is much cheaper and efficient to buy Trader Joe's Blanched Slivered Almonds and grind them up in your food processor. I used to actually blanch almonds myself and grind and dry them, but that was WAY too much work.) 150g powdered sugar 50g egg whites (do not have to be aged, approximately 2 eggs) Gel food coloring (optional) 2 tsp cornstarch (if weather is humid) pinch of salt
Meringue: 55g egg whites (do not have to be aged, approximately 2 eggs) 35g granulated sugar (to stabilize half egg whites) 120g granulated sugar 40g water
Materials: Candy thermometer Kitchen/postal scale Piping bags/tips (These give the most perfect results if that's what you're going for) Good insulated baking sheets (I use Airbake) Parchment paper or silpats (I prefer silpats but parchment is nice too) Stand mixer (recommended, but it is possible with a hand mixer, just takes longer)
Sift almond meal and powdered sugar together into a large bowl. Add the 50g egg whites and mix until it becomes a dough-like consistency. (This is the time to add food coloring, remember the meringue will lighten the color of the mass)
Set aside and cover with plastic wrap so it doesn't harden.
For the meringue, beat the 55g egg whites in the bowl of your stand mixer until soft peaks form. When egg whites become bubbly, add the extra 35g sugar to stabilize it. DO NOT overbeat egg whites at this stage. After they have formed, turn down your mixer to "stir" or very low to keep them moving so they don't deflate.
At the same time, put the water and sugar on the stove over medium-high heat and attach your candy thermometer. When the mixture gets bubbly all around with no spots of unboiled water (or 240 degrees F) pour the sugar syrup into the egg whites and turn up the speed of your mixer to high. Let it beat until the bowl of the mixer is warm to the touch (body temperature). It should look like this:
Shiny, stiff, and smooth.
Then, add 1/3 of the meringue to the mass and fold until you cannot see any more white streaks of meringue. After you have lightened the mass, add the rest of the egg whites and fold.
Now you are ready to pipe them with your piping bag into 1-1.5 inch diameter circles, however big you like. I pipe them onto a parchment paper-lined or silpat-lined aluminum baking sheet. I usually fit about 20-24 circles on each pan.
Then drop your baking sheets about 2-3 times until they flatten out and the air bubbles pop. If you still see any, pop them with a toothpick. Now let them dry about 20-30 minutes or until they are dry to the touch (depends on humidity). While you're waiting, preheat your oven to 300 degrees Fahrenheit Check your oven to make sure it's the correct temperature! Sometimes the oven lies. lol
Dull and dry, ready for the oven.
Now bake them for 10-13 minutes, or even longer if they are still too moist inside. Bake only one tray at a time if your oven has inconsistent heat. Let them cool completely before you take them off the parchment/silpat.
Sandwich together with a filling (my favorite is Swiss Meringue Buttercream) and you're done! Store filled shells in an airtight container in the fridge for at least 24 hours. This helps the shell meld together with the filling, making it a bit crisp on the outside but melt-in-your-mouth on the inside. :)
This is my favorite recipe. I have not had a single macaron crack or turn out feetless after using this recipe. I will NEVER go back to French meringue method. These macarons turn out more cakelike and have better structure on the inside. Look at the nice inside on these ones!
Do you see hollows?!?! Nope. Unlike this ugly one here from this patisserie in SF. How sad.
And if you still do not understand how to do this recipe, here is a video I made instructing you how to do it,
Macarons...they're the trendiest little cookie out there. I myself have fallen in love with them. I love everything about them! They're pretty, come in many colors, have a nice little ruffle called a "foot", and they are just so yummy. But over months of making them (and many were failures, sadly to say), I have learned many things that I can pass on to you guys, the newbie macaron bakers.
First of all, now that I have tried the Italian Meringue Method, I never want to go back to the French method. These bear-shaped macarons up there are made using the French Meringue Method, but they tend to produce a more crunchy, airy cookie that melts in your mouth. The Italian Meringue macarons are more soft, chewy, and cake-like. They also melt in your mouth. However, the Italian Meringue method is WAY more stable than the French, since it uses a sugar syrup to stabilize the egg white meringue. I always have trouble explaining these things to people who aren't bakers...they have NO IDEA what I'm talking about. All they want to do is eat the cookie. Anyways, I have had way more failures using the French meringue method, and NO FAILURES AT ALL using the Italian Meringue method. Plus, it's the one Pierre Herme uses. Can't go wrong with that.
Now, on to my tips and tricks...(I am talking about the Italian Meringue method here)
It is not absolutely necessary to own a kitchen thermometer or a stand mixer
...but it makes your job a hell of a lot easier. To me, the sugar syrup is ready when all of the sugar is bubbling and there are no spots of sugar left. I had to deal with that yesterday when my candy thermometer got wet :( Right now it is in a bag of rice as we speak. Anyway, my macarons turned out fine! No problems at all. The meringue got nice and glossy, and I mixed that in to the tant pour tant mixture (almond/powdered sugar paste). You don't need a stand mixer, but that means you'll be whipping the meringue for like 5 minutes straight until it is room temperature. You would also be multitasking, watching the sugar syrup and the meringue at the same time. Trust me, my KitchenAid stand mixer is the best investment I have made. It is like another pair of arms! If only it could clean for me..
You should make your macaronage stiff enough that it will dry up on its own. Overmixing is the worst thing you can do. It is better to undermix than overmix, since it will warm up while your hands are working the piping bag. To check if your batter is stiff enough, leave it there for a couple minutes and touch it with your finger. If it doesn't stick, it's good. If it does, you've gone too far.
300 degrees works the best for me, baking for 15-20 minutes. My oven is a convection oven, so it runs a little hot. I tried doing 320 at first, since Not So Humble Pie's blog suggested it. However, it just made the feet on my macarons burst and look terrible. I like the temperature lower and longer better than higher and shorter. That way it is harder to overbake them. I tried 280 degrees before, but it makes them hollow and sad :(
Silpats are the best option for me when making macarons. 300 degrees works wonders on them, now I wonder why I didn't use them before. I first tried using silpat with my French meringue macarons, but they would always stick to the bottoms! But with the Italian ones, they come right off! And I love how you can just wash it and use it again unlike yucky parchment. I hate throwing parchment away. Also, since I use AirBake baking sheets, they aren't completely flat, so when I use parchment they end up being lopsided. With the Silpats, they stay uniform and round :)
It is not necessary to own a kitchen scale. I use a postal scale, and it works out fine. :) Why should I spend more money on something that I have at home?
I am very proud of this batch of macarons! They are, in fact nut-free as well. I used vanilla beans to flavor the shell and then made a peppermint bark buttercream. Although, I must say, it looks like a ganache! Ghiradelli peppermint bark is one of my most favorite chocolates of all time. OF ALL TIME! I figured since I read so many macaron blogs, I should start my own. Don't know if I should give you guys the recipes, but for now I will just post my methods and tips. :)
Googling has become one of my regular everyday things, especially when I'm bored at work. I usually google random stuff, or lately it has been macaron flavors and recipes and ideas. One day, I was bored and I found someone's website who had this great idea of swirling the macarons like the actual peppermint candy! At first I was gonna use edible glitter to decorate the tops, but this works much better. All you have to do is paint the inside of the piping bag with red stripes, and fill up the piping bag while it's open. Only problem is that you have to keep washing out the bag and painting the inside of the bag. But it produces such a pretty and cute result! It's worth it, trust me.
Also, I MUST state that after many trials of macarons, I can say that the Italian Meringue Method is the most reliable, prettiest, and produces less hollows. I despise the French method now! haha.
Another thing that bugs me that's on these macaron blogs are that they tell you to "baby the meringue", or "age the egg whites for 5 days", or "let it rest for 3 hours", or "don't use silpats". NONSENSE THINGS LIKE THAT!
I would like to officially de-bunk these myths....
YOU DO NOT HAVE TO AGE THE EGG WHITES...NOT AT ALL
- However, you can if you wish to, especially if the weather is humid and rainy. But personally, it's too much effort. I am busy with work and school, you think I have time to separate the eggs from the whites and then leave it out for a few days and just let it come to room temperature slowly?! NO. What I found to work best is to microwave the egg whites for 8-10 seconds. I don't use really cold egg whites, just in case it doesn't work when I whip it. haha
YOU DO NOT HAVE TO "SLOWLY" ADD IN THE SUGAR ONE TEASPOON AT A TIME.
- You can just dump it all in at once...you do that with swiss meringue buttercream, so why would you need to baby the meringue with macarons?
YOU DO NOT HAVE TO REST THE MACARONS.
- NONSENSE! Who actually has the time to rest them for 3 hours?! It is a matter of proper macaronage...I find the best way to produce macarons without resting them is using the Italian Meringue method, making the powdered sugar & almond mixture a paste using half the egg whites. It also produces a sturdier batter. Pretty much if it is not runny and not too solid, you have a good batter. If you pick up the spatula and it leaves a mark and takes a while to go back into the bowl, then you're good. You can also check if your batter is good enough by leaving the batter out for 10-15 minutes and if you touch it, it won't stick to your finger. Make sure it is thick enough to hold a shape and not ooze out of your piping bag too fast.
Here's what overmixed looks like:
and here's what your batter should look like:
And there you have it. :) I will post my tips and tricks later on. Gotta go to lunch. Bye <3