

For starters, I will just use the Vanilla Bean Macarons recipe. I have adapted it from Bouchon Bakery's cookbook. If you've ever tried Bouchon Bakery, their macarons are not too sweet, slightly chewy but melts in your mouth. Paired with my delicious, fluffy, and not too sweet new buttercream recipe, it becomes a crowd favorite.
What I do like about this recipe is that it isn't too sweet (personally) and that the shells come out smooth and with smaller feet. They also tend to dry a little faster than the French method. I also have some new tips to add to help speed up your macaron making process, which I will include in another post later. I did not include a recipe for only 1 dozen, because the macarons seems to not turn out as well when I split it up in small batches. The original recipe makes 4 dozen macarons, but I'm sure most don't want to make that many. So I included this recipe for 2 dozen.
So let's get to it!
A delightfully fluffy, delicious vanilla bean macaron that "is far from basic". Below are some vanilla bean macarons that I made for a special order and dyed them burgundy with a gold brush stroke. I also can give a more in depth tutorial on designs as well!

- 112g almond flour
- 100g powdered sugar
- 50g egg whites (for mass)
- Pinch of salt
- 1 tsp vanilla bean paste
- 118g granulated sugar
- 79g water
- 45g egg whites (for the meringue)
- 226g unsalted butter, softened (2 sticks)
- 37g almond or whole milk
- 37g powdered sugar
- 7g vanilla bean paste

- Sift together almond flour and powdered sugar into a bowl. If almond flour is not finely ground, grind it together in a food processor.
- Add the 50g egg whites and vanilla bean paste into the bowl, then mix together with a rubber spatula to create a paste (the mass).
- Weigh out your 45g egg whites for the meringue and put it in the bowl of your stand or hand mixer (I recommend stand mixer).
- In a small saucepan, add the granulated sugar and water, then boil at high heat, checking the temperature with a candy thermometer.
- When the sugar reaches 230 degrees Fahrenheit, turn the mixer on to speed #5 and whip the egg whites with the whisk attachment of your stand or hand mixer until they are frothy and almost at soft peaks. At the same time, the sugar will be set to reach 248 degrees Fahrenheit while you are whipping the egg whites.
- When the sugar syrup reaches 248 degrees Fahrenheit, turn off the heat and bring it to the mixer. Drizzle the syrup down the side of the bowl into the whipped egg whites.
- Turn up the speed to 7-8, and whip for another 3 minutes until the meringue reaches medium peaks that are shiny and soft yet firm. It is important that you do not overwhip or underwhip the egg whites at this stage, or your macarons will either be hollow or crack.
- Once ready, add the whole meringue to the almond flour and powdered sugar mixture. Use your rubber spatula to fold the meringue with the mass by turning the bowl, then folding and scraping the sides and bottom of the bowl. This method is called the macaronage. Keep folding and turning the bowl and flattening the batter against the bottom of the bowl until your batter is thick but still flowing, like thick pancake batter. It is very important that you do not overmix or undermix the batter, as it will determine if your macarons are flat , hollow, or cracked. A good way to check if the batter is done is to lift up your spatula and see if the batter flows back into the bowl. If the batter does not disappear into itself in 15 seconds, then it is undermixed, so keep going. If it falls off the spatula at a medium rate and then disappears into the batter after 15 seconds, then it is ready. Do not go past this stage otherwise your macarons could crack, be flat, or will never form a skin on top which prevents cracking.
- When the batter is done, prepare a piping bag and Wilton Tip #12, and unroll it into a mug or large cup to make it easier to pour in the batter. Pour the batter by using your spatula to guide the batter into the bag inside the mug, and then roll up the sides and twist the top to prevent any from coming out of the top. You want to make sure you don't hold the bag with the piping tip facing downwards, otherwise batter will spill out of your bag.
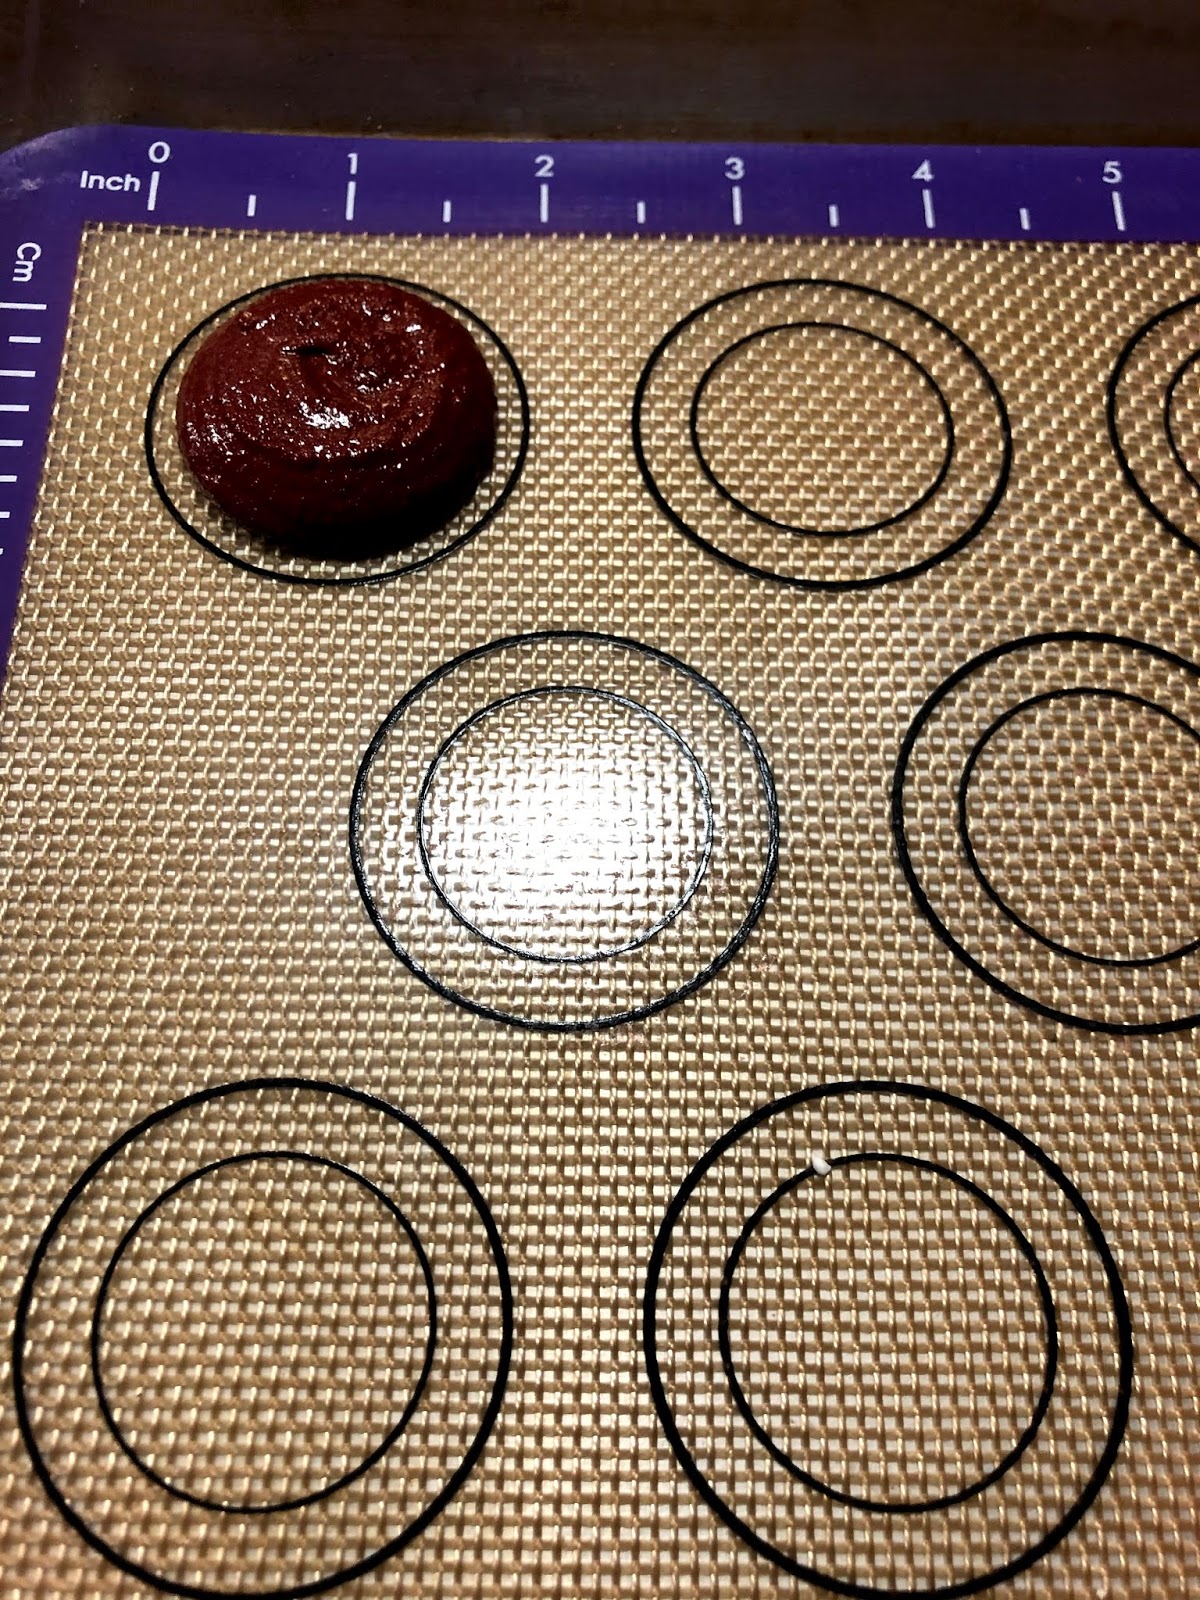
- Prepare a baking sheet (I prefer Nordic Ware Baking Pans - Half Sheet Size) and a silicon mat or parchment paper lined with a circle template. Using your left hand, guide the piping bag to the mat and your right hand to squeeze out the batter, and pipe out 1.5-2" inch circles about 1 inch away from each other. To end each circle, flick the piping tip to the left so that it doesn't leave a "nipple".
- Once finished piping them all out (this will take about 2 trays), use your hand or the kitchen counter to rap the trays a few times to flatten out the macarons and remove any air bubbles. This is also an important step because these can also make your macarons hollow or misshapen.
- Now leave them in front of a fan to dry for about 30 minutes-1 hour. This helps to create the 'skin' on the macaron to prevent any cracking and so that they rise up to create a "foot" or the ruffle on the bottom of macarons. If it is humid, use a dehumidifer to absorb any moisture in the air. It is also important to preheat your oven to 320 degrees around this time so that it will be ready when your macarons are dry. You can tell if they are dry if they are matte, or you touch them and they do not stick to your finger.
- When the macarons are dry, bake them in the oven for 11-12 minutes depending on how hot your oven is. In the summer for some reason I can bake them at 11 minutes, but in winter I need to bake them at 12 minutes or they will be too sticky inside.
- After baking, let the macarons cool for 10-15 minutes. During this time, you can make the delicious filling!
- To make the filling, make sure that your butter is very soft, at room temperature. If you do not have time, you can microwave 2 sticks of butter for about 15-18 seconds in the microwave, depending on your microwave's power.
- Add the softened butter to the bowl of your stand or hand mixer with the whisk attachment (I prefer stand mixer) and whip for about 2-3 minutes on high until it gets white and fluffy.
- Add in the almond or dairy milk as well as the powdered sugar and vanilla bean paste at the same time, then whisk on low speed for a minute just to get incorporated. Once incorporated, turn up the speed to high and whip for another 2-3 minutes. If it is separating or not coming together, the butter is either too cold or you have not whipped it long enough.
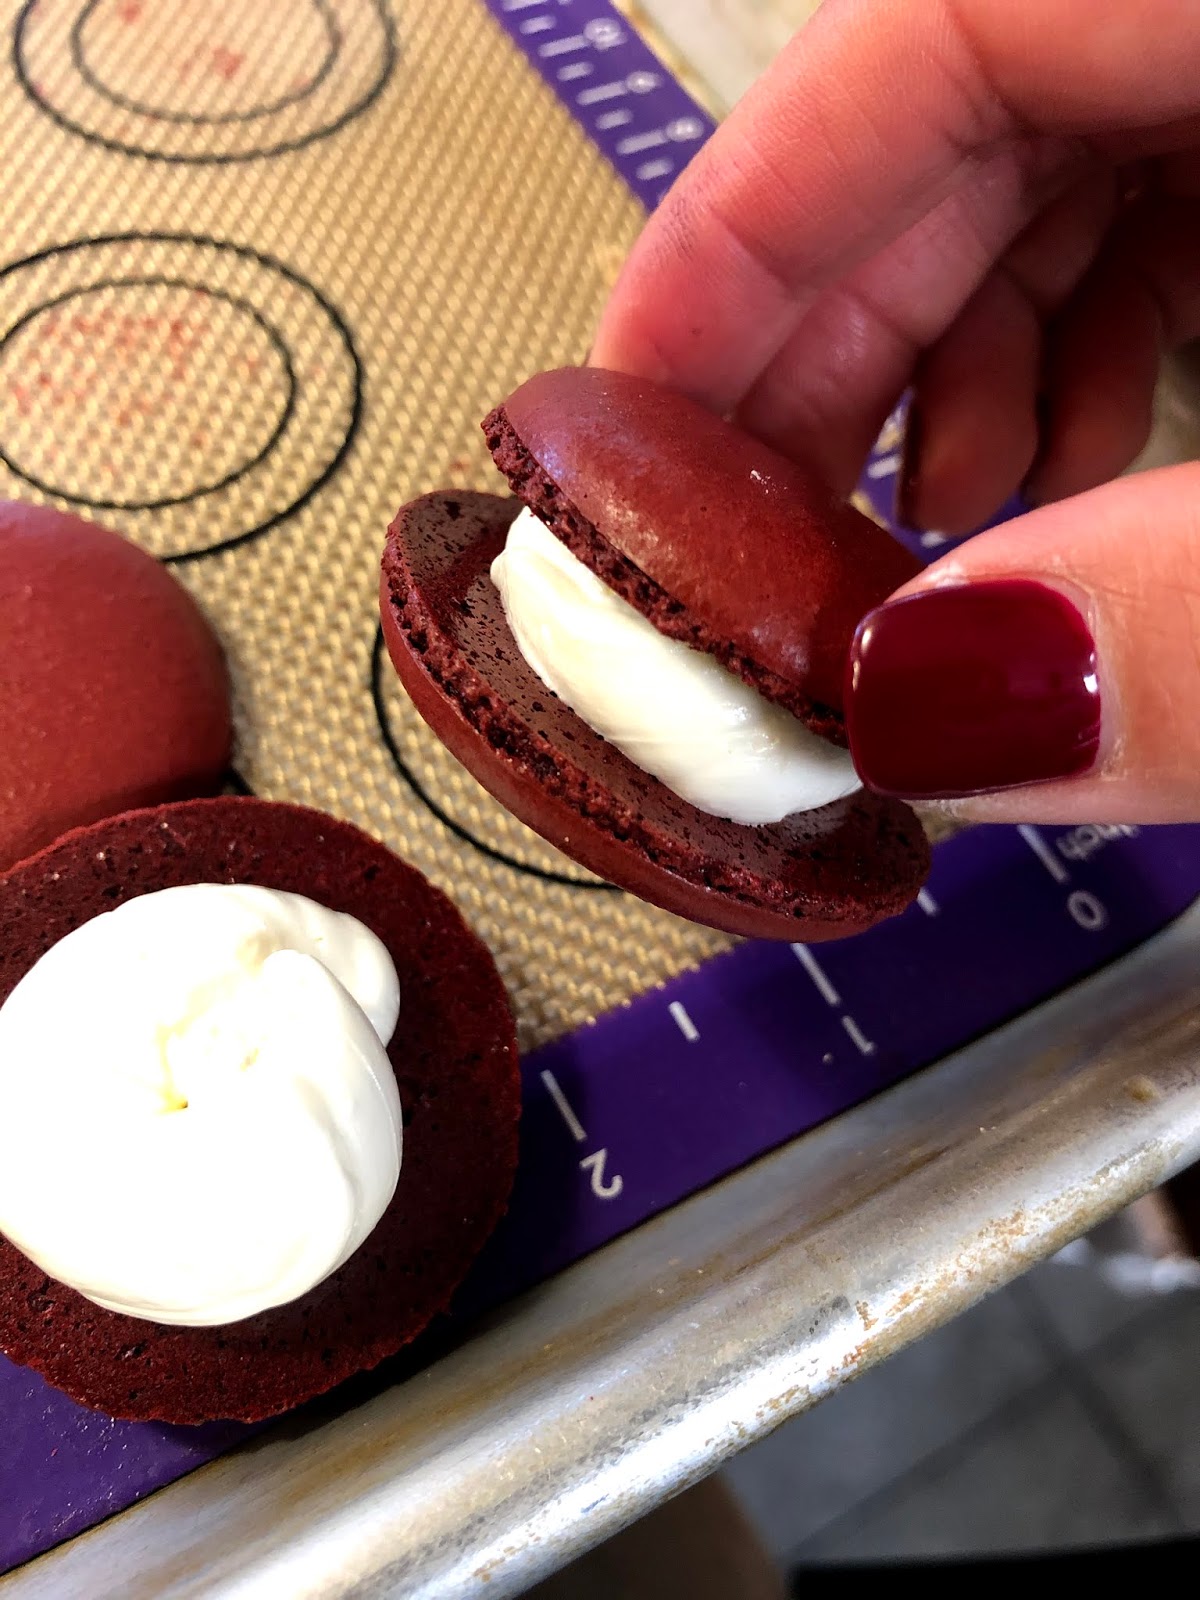
- Now, we can assemble the macarons. Using the backside of your silicon mat or parchment paper, pop the macaron shells off and match them together.
- To fill the macarons, use a piping bag to pipe an even swirl or dollop onto the underside of one macaron shell. With the matching macaron shell, sandwich it together while at the same time twisting and pushing it down a little so that the filling touches both sides evenly.
- Once completed with all 24 macarons, you can store them in the fridge for 4-5 days or 1 month in the freezer for best taste. Macarons actually taste better the next day when the shell and filling has melded to create a crisp, yet moist texture as well as more prominent flavor. These turn out to be not hollow if you mix the batter correctly!:)


Heyy !! I’m so happy your back !! I just tried your recipe and they came out completely full right out of the oven but then after like 15 minutes , they became a tiny bit hollow , not too bad though , any idea why this could happen, I’m thinking maybe to keep them in the oven for an extra minute ?
ReplyDeleteHi Steph! Aw thanks I'm glad to be back too :) I would say that you could bake it another minute! As I mentioned, in the winter for some reason they need another minute or so to bake because it's cold and they shrink inside after being exposed to cold air. Otherwise, I have found that 325 for 11 minutes works too. They come out completely full but they may get more brown on top. That's why I adjusted my baking time to 320 for 12 minutes. Hope that helps!
DeleteHave you ever used refrigerated egg whites (that come in a carton)? Would you recommend that? Or not?
ReplyDeleteHi Carole!
DeleteI have tried them before, however since they are pasteurized they don't whip up for me. Something about the proteins in the egg whites being cooked off has to do with it. But I've seen other bakers on instagram have success with it. I just think that egg whites in a carton for one, cost more, and two may not work.
Hi Natalie!
ReplyDeleteI've been following your blog and using the old French macaron method for quite a few years. I'm looking forward to trying out this one! Quick question: do the egg whites need to be room temperature or is straight out of the fridge fine?
Thanks!
Hi Rose! Yes I agree that method is great as well, I used it for many years too. But once I found this one, I'm hooked! haha. The eggs do not need to be room temperature, can be straight out of the fridge.
Deletehi! I swung by here specifically to see if you had posted any corrections to your book. The macarons come out great but there appears to be some issues with the buttercream as most recipes call for only 3 Tablespoons of sugar.... I'm enjoying your book and looking forward to following your blog
ReplyDeleteHi Jeni, the recipe turns out fine for me as long as I whip it long enough that the buttercream doesn't separate. And for me, I prefer less sugar but I guess not everyone likes that little sugar. You can add more if you prefer, probably 1/2 cup. Sorry about that!
DeleteHi! So I have a question, I love your recipe(no hollows=amazing!) but it only works for me if I use parchment. Every time I use a silpat, they dome up terribly and burst through the top. It's so depressing. But then if I use parchment, even on the same batch, they work great. I really want to be able to use the silpat since I get so much better circular shapes. The parchment always gets a little wonky looking. I have a batch in the oven right now and I just turned it down to 300 to try to see if a lower temp helps at all... anyway, let me know if you have any ideas!
ReplyDeleteHello! That is so odd because I always use silpat, never parchment. You can try doing it at 310 or 315 for 14 minutes? Would you be able to show me an example photo of this?
Deletehi, natalie!
ReplyDeletei tried to use this recipe, however it seems that no matter what i do, the macarons turns out overbrowned and has a meringue cookie like texture. i suspect its because my convection oven is smaller and the macarons is in closer proximity to the heat source. i've used an oven thermometer, so i guess the problem is that the heat source comes from both top and bottom and it cooks the macaron faster before the feet could rise. my question is, should i use only the bottom source or the top to avoid the macaron setting before the feet could rise? sorry if this is confusing.
I am Alecia Maldonado used every single spell worker on the internet, spent untold amounts of money and discovered they are all fakes...i was the fool though; doing the same thing over and over again and expecting different results. In the end, I decided that I wanted a tarot reading to know what my future held for me; I contacted a woman who lives locally to me and she told me about a man named (Dr Mandaker); he just got he just got his website (holyaraminta.com), has another job for income, has no set prices, makes no false promises and refuses to help anyone that cannot be helped and even helps
ReplyDeletefor free sometimes, he will give you proof before taking money. He is a wonderful man and he was the only person who actually gave me real results. I really hope he doesn't mind me advertising his contact on the internet but I'm sure any help/ extra work will benefit him.contact him as witchhealing@outlook.com He travel sometimes.i cant give out his number cos he told me he don’t want to be disturbed by many people across the world..he said his email is okay and he’ will replied to any emails asap,love marriage,finance, job promotion ,lottery Voodoo,poker voodoo,golf Voodoo,Law & Court case Spells,money voodoo,weigh loss voodoo,any sicknesses voodoo,Trouble in marriage,HIV AIDS,Barrenness(need a child),goodLuck voodoo,it's all he does Hope this helps everyone that is in a desperate situation as I once was; I know how it feels to hold onto something and never have a chance to move on because of the false promises and then to feel trapped in wanting something
more!
God bless Herbalist Harry for his wonderful work in my life he cured me completely from herpes & aids with his herbs. I only took his herbs for two weeks and I was completely cured from hiv/aids. You can reach him through his email: {drharryherbs@gmail.com} Call or Whatsapp +2348142350014
ReplyDelete